Maple IDE
This page documents the basic functionality of the Maple IDE. Specifically, it describes the operation of the buttons on the main toolbar. It is expected to become more comprehensive over time.
If you’re new to Maple, you should begin with the Maple Quickstart.
If you need to install the IDE for the first time, see the Maple IDE Installation page.
IDE Windows
The following screenshot shows the appearance of a Maple IDE window:
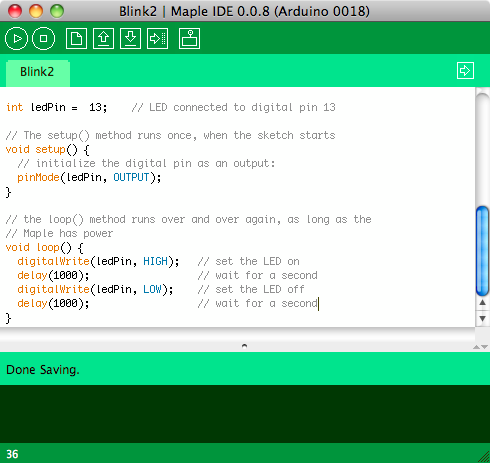
Note the toolbar buttons at the top; they’re the icons with circles or squares around them. You can program your board mostly through the use of these buttons, which are described in the next section.
Toolbar Buttons
Verify

Click Verify to compile the current sketch. This will process your program and produce an executable which can run on your board.
Stop

Click Stop to cancel a compilation. Longer programs may take a while to compile. Clicking Stop will let you go back to writing code without having to wait for compilation to finish.

Open

Click Open to open an existing sketch. Maple IDE will first look for the sketch in your sketchbook, which is a folder on your computer that contains your sketches. The sketchbook is stored in different places depending on your operating system. You can change its location in the IDE’s preferences.
Save

Click Save to save the currently opened sketch. This will save all open tabs, not just the one you’re currently looking at.
Upload

Click Upload to send the compiled sketch to your Maple to run. Before you click Upload, you must have a memory location and serial port selected.
The memory location, either Flash or RAM, determines whether the compiled sketch binary will be stored on the Maple. You can choose this using the Tools > Board menu.
The serial port corresponds to the SerialUSB connection the Maple establishes with your computer. This looks like “COM1”, “COM2”, etc. on Windows, “/dev/tty.usbmodemXXX” on Mac (where “XXX” is some sequence of letters and numbers), or “/dev/ttyACMXXX” on Linux (again, where “XXX” is some sequence of letters and numbers). You can choose a serial port using the Tools > Serial Port menu.
If you’re trying to upload and are unsuccessful, make sure you’ve made choices for both board and serial port. More help on uploading (including screenshots) is available in the quickstart.
If all else fails, try putting your Maple in perpetual bootloader mode before uploading. You can always find us on the forum or contact us directly for help on any problems you’re having.
Serial Monitor

Click Serial Monitor to open up a communication channel between your PC and the Maple’s SerialUSB virtual serial port.
If the serial monitor is open, any information sent to the computer (for example, using SerialUSB.println()) will be displayed in the large text area. You can send data to the Maple by typing into the small text box and either hitting the Enter key or pressing the Send button. (The Maple can read the data you send with SerialUSB.read()).
Here is an example serial monitor session with the InteractiveTest sketch (which you can load in the IDE by choosing menu item File > Examples > Maple > InteractiveTest):
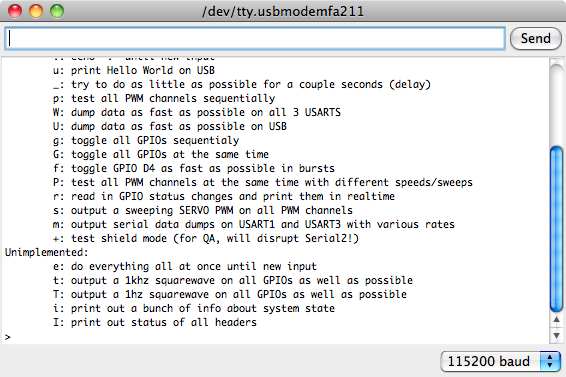
This is the result of typing ”?” in the text box and clicking Send.
Note
You cannot upload a sketch while the serial monitor is open. If you click Upload while the serial monitor is open, the IDE will close it for you before proceeding with the upload.
Example Code
Maple IDE comes with a variety of sample code you can use to help you get started writing your own programs. To load an example in a new Maple IDE window, choose one from the submenus under File > Examples.