Navigation
- next
- previous |
-
leaflabs.com ·
- Index »
You’ll need a Maple board, a Mini-B USB cable, a functional computer, and possibly root (or “administrator”) access to that computer.
If you have trouble along the way, try the troubleshooting page for help with some common problems. If all else fails, try our forum, or contact us directly!
Contents
See the IDE installation page for instructions.
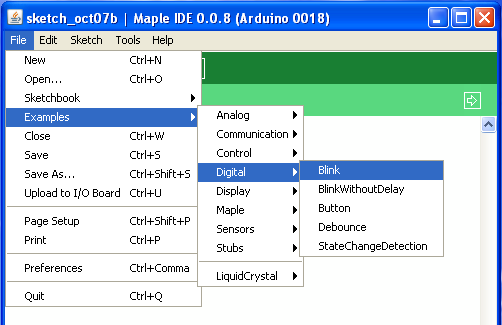
Let’s load up a simple example program that blinks the status LED. From the File menu, select Examples > Digital > Blink:
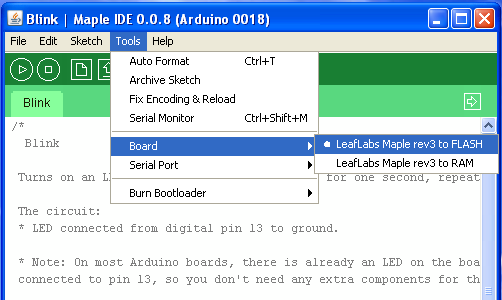
Next, select Tools > Board > “LeafLabs Maple ... to Flash”, where ”...” depends on the board you’re using.
Note
You have the choice between Flash and RAM programming. Flash saves the program into permanent Flash memory. RAM simply puts the compiled program into the processor’s built-in RAM.
Flash memory is larger, and is the only option for permanently uploading a program. Programming to RAM is faster to upload, and a buggy program can be wiped away with a simple reset.

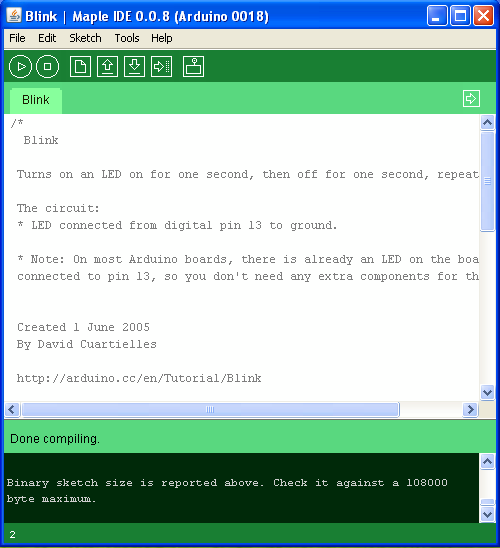
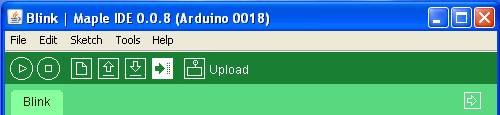
Now press the “Verify” button (the “play” symbol; see image at left) to compile the code. Some output should scroll by in the bottom window, and then a confirmation message will appear:
Now it’s time to plug in your Maple. Use a USB Mini-B cable (mini, not micro).
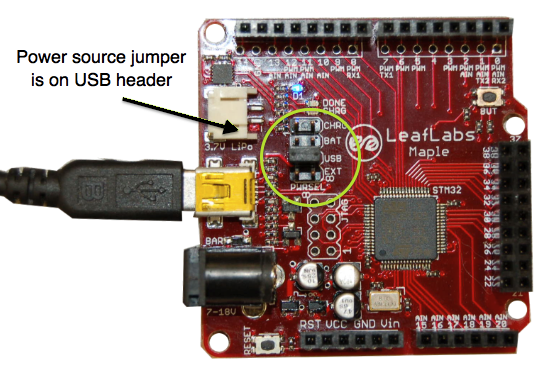
On the Maple, make sure that the power source jumper is on the USB header first (the same goes for Maple Native). We ship Maples with the power source jumper configured that way, so you shouldn’t have to do anything. For reference, it should look like this (don’t worry if a jumper is hanging half off of the CHRG header):
Note
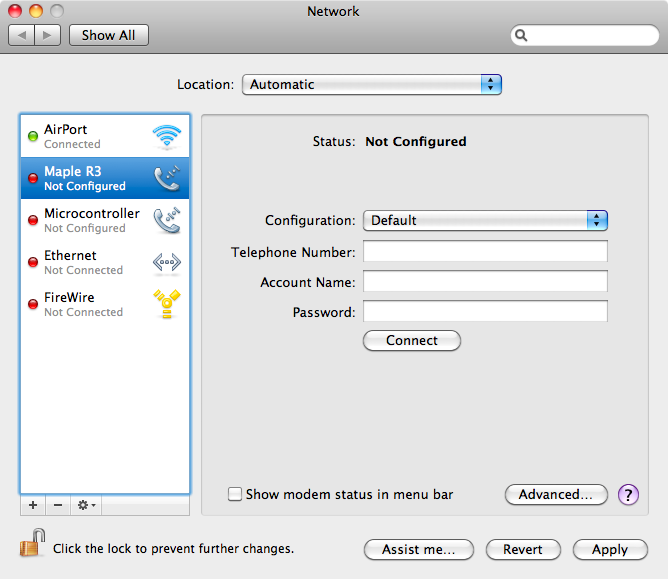
On OS X, a network interface dialog will pop up every time you plug in the board.
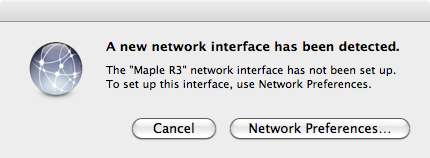
If you click “Network Preferences...” and accept the default (“Not Configured”), the dialog won’t pop up and everything will work fine. That is, from this window, click “Apply”:
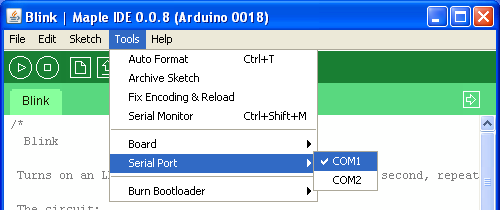
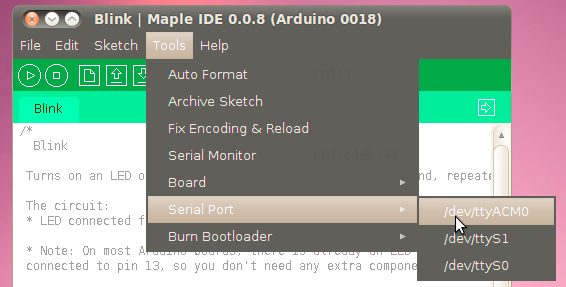
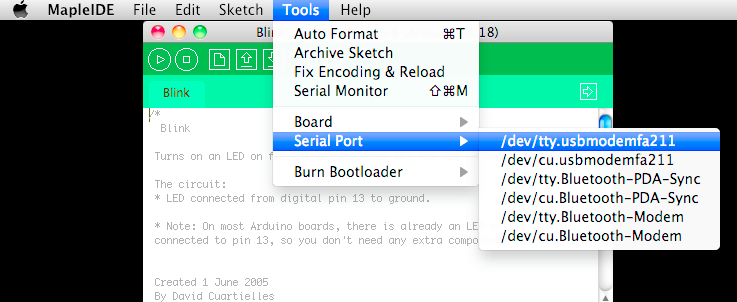
If all systems are go, select your board’s serial port in the Tools > Serial Port menu. It will appear as something like COMx, /dev/ttyACMx, or /dev/tty.usbmodemxxxxx, depending on your platform, like so:
Windows XP:
Linux:
OS X:
Then press the “Upload” button to upload your program over USB.
You should see some text and a progress bar flash by in the status window of the IDE, then some quick blinking patterns, followed a constant blinking on and off. Congratulations! You’ve successfully uploaded your first program to your Maple.
The built-in status LED should blink in a short pattern every time the board is plugged in, reset, or reprogrammed. If it ever starts throbbing in a smooth, even pattern, then you’ve got a problem; see this troubleshooting item for help.
Next, go ahead and modify the file a little bit. If you change the number in the delay(1000); lines, the speed of the blink will change. The number is a time in milliseconds to pause before continuing with the program, so by default, the LED will be on for 1 second, then off for 1 second, etc. Any time you make any changes, go through the same Verify and Upload process to upload the new version of your program to your Maple.
Warning
The uploading step is the most common source of problems, especially on Windows.
The situation is much improved over the past, but if you have trouble, try doing things again, unplugging your Maple and plugging it back in, using perpetual bootloader mode, or restarting the IDE.
If nothing works, please report the problem in the forum.
As a last step to make sure everything has been configured correctly, let’s upload a “Hello, world!” program that will send text from the board back to the IDE over the USB connection.
From the File menu, select Examples > Stubs > HelloWorld (similarly to how you selected the Blink program), and make sure the correct board and serial port targets are selected from the Tools menu.
Open the Serial Monitor window (on the far right of the toolbar). Then go back to the code editing window and upload your program. You should get text spit at you over the serial monitor right after the program is uploaded. Shout back! We can hear you!
We really hope you got this far and didn’t frown or make a bitter lemon face getting here. Where you go now is up to you: perhaps you’ve got some crazy project cooking, or a longer tutorial to work through, or maybe now is a good time for a trip to the kitchen for a delicious sandwich.
If you blew through this guide and are the kind of person who drinks their coffee straight, has more than a 100 lines of vim or emacs customization, and doesn’t even have a mouse plugged into their computer, you may want to look at the Unix toolchain quickstart guide. It’s the tutorial for getting working with your old friends make, gcc, and jtag.
Let us know what you come up with! Reach us at leaflabs on Twitter, post in the forum, post on our wiki’s Projects page, track us down in the real world, whatever. We love projects!